Imagine making a delicious, homemade Italian meal in just about 45 minutes. You can make this easy calzone dough from scratch. It’s quick, nutritious, and tasty.
Making your own calzone dough at home lets you choose the ingredients. This way, it’s light and healthy. With a simple homemade calzone dough recipe, you can enjoy your favorite Italian dish easily.
Table of Contents
The Art of Homemade Calzones
With the right ingredients and techniques, you can master the art of homemade calzones. This traditional Italian dish has gained popularity worldwide for its versatility and flavor. As you embark on your culinary journey, understanding what makes a great calzone and its origins will enhance your cooking experience.
What Makes a Great Calzone
A great calzone is known for its crispy exterior and fluffy interior. It’s filled with a mix of cheeses, meats, or vegetables. The secret to this is the quality of the dough and the right balance of fillings. An easy calzone dough recipe should make a dough that’s both soft and strong enough to hold its fillings.
- Use high-quality ingredients for the filling.
- Balance the fillings to avoid overloading the dough.
- Ensure proper sealing to prevent leaks during baking.
The Italian Origins of Calzones
Calzones come from Italian cuisine, specifically Naples, where they were a street food. The idea of folding dough over fillings started in the 18th century. An authentic calzone dough uses simple ingredients like flour, yeast, water, salt, and olive oil. This reflects the traditional Italian baking style. As one source says, “Think of a cheese calzone as pizza’s confident, folded-up cousin, all the cheesy, saucy goodness you love, sealed into a golden, crispy pocket.”
Essential Ingredients for the Perfect Calzone Dough Recipe
Making the perfect calzone dough starts with knowing the key ingredients. The right mix of ingredients is key for the right texture and taste. We’ll look at the main parts of a great calzone dough.
Flour Options and Their Effects on Texture
The flour you choose greatly affects your dough’s texture. Different flours give different results. It’s important to pick the right one for your dough.
All-Purpose vs. Bread Flour
All-purpose flour is a good choice for calzone dough, offering a balanced texture. Bread flour, with more protein, makes a chewier crust. Your preference for texture will guide your choice between these flours.
| Flour Type | Protein Content | Texture Result |
|---|---|---|
| All-Purpose Flour | 10-12% | Balanced, tender crust |
| Bread Flour | 12-14% | Chewier, more robust crust |
Italian 00 Flour for Authentic Results
For a true Italian calzone, use Italian 00 flour. This flour makes a tender, delicate crust, just like traditional Neapolitan pizza and calzones.
Yeast Types and Their Differences
Yeast is crucial in calzone dough, causing it to rise. There are many types of yeast, each with its own traits.
Active Dry Yeast is a favorite among home bakers. Instant Yeast, or rapid rise yeast, works faster and can be mixed with dry ingredients. Fresh yeast, or cake yeast, is less common in home baking.
Salt, Oil, and Other Key Ingredients
Ingredients like salt, oil, and water are also vital. Salt adds flavor and controls yeast. Olive oil makes the dough richer and softer. Water hydrates the dough. Some recipes include sugar to help yeast grow.
Knowing the roles of these ingredients helps you make better choices for your calzone dough.
Equipment Needed for Making Calzone Dough
The right tools are key to making homemade calzone dough. With the right equipment, you can mix, knead, and bake your calzones perfectly.
Essential Tools for Mixing and Kneading
You’ll need a large mixing bowl to start. A stand mixer is great if you make dough often. It makes mixing and kneading easier. But, a wooden spoon and a lightly floured surface work well for manual mixing and kneading.
A dough scraper is important for handling the dough. Also, a clean work surface is needed for kneading. A pastry cloth can help prevent the dough from sticking.
Baking Equipment for Perfect Results
For baking, you’ll need a baking sheet or a pizza stone for a crispy crust. Some prefer a Baking Steel for an even crisper crust. Preheat your oven to the highest setting. Make sure you have a wire rack for cooling your calzones.
| Equipment | Purpose |
|---|---|
| Stand Mixer | Mixing and kneading dough |
| Dough Scraper | Handling and scraping dough |
| Baking Steel or Pizza Stone | Achieving a crispy crust |
With the right equipment, you’re on your way to making a delicious calzone dough recipe that will wow everyone.
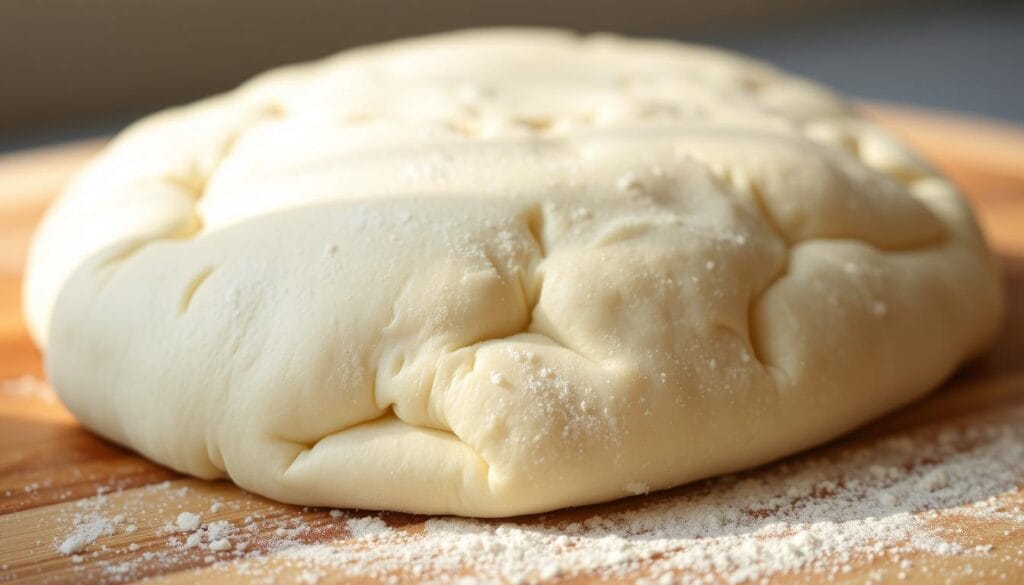
Step-by-Step Calzone Dough Recipe
With this quick calzone dough recipe, you can make delicious homemade calzones fast. It involves a few easy steps that require patience but pay off with great results.
Mixing the Dry Ingredients
To begin, mix the dry ingredients. These include flour, yeast, salt, and sometimes sugar. In a big mixing bowl, put 2 cups of flour, 1 teaspoon of salt, 1 teaspoon of sugar, and 1 packet (2 1/4 teaspoons) of active dry yeast. Whisk them together until they’re well mixed.
Using top-notch ingredients is key. The right flour can change the dough’s texture and taste.
Adding Wet Ingredients and Forming the Dough
Now, add the wet ingredients to the dry mix. This includes warm water and olive oil. Slowly add 1 cup of warm water (around 100°F to 110°F) and 2 tablespoons of olive oil to the dry ingredients. Mix until a dough starts to form.
The water’s temperature is important for the yeast. Make sure it’s not too hot or too cold.
Kneading Techniques for Perfect Texture
Kneading is vital for the dough’s texture. You can knead by hand or with a stand mixer and dough hook attachment.
Hand Kneading Methods
To knead by hand, place the dough on a floured surface. Knead for about 10 minutes until it’s smooth and elastic. This can be hard work but is very rewarding.
Using a Stand Mixer Effectively
Using a stand mixer is easier. Attach the dough hook and mix on low speed for 5-7 minutes. This method is less tiring and works well.
Whether by hand or mixer, aim for a dough that’s smooth and elastic. This means it’s ready for the next step.
Proper Rising and Proofing Methods
After kneading, put the dough in a lightly oiled bowl. Cover it with plastic wrap or a damp cloth. Let it rise in a warm, draft-free area. It should double in size in 1 to 2 hours, depending on the environment and yeast.
- Ensure the rising area is free from drafts.
- Keep the dough away from direct sunlight.
- Check the dough periodically to determine if it has doubled in size.
Once risen, punch down the dough to release air bubbles. This step is key for a uniform texture in your calzones.
Tips for Achieving the Best Calzone Dough
Making the best calzone dough is more than just a recipe. It’s about knowing the key factors that affect dough quality. To make an amazing homemade calzone dough, you must understand the details of dough preparation.
Understanding Dough Hydration
Dough hydration is key to the texture and quality of your calzone crust. Finding the right balance of water and flour is crucial. Using white whole wheat flour can make your dough lighter, some say.
Start with a hydration level of 60-65%. But, this can change based on flour type and humidity. For example, high-protein flour might need a different hydration level.
Temperature Considerations for Optimal Rising
Temperature is important for yeast activation and dough rising. Yeast works best in warm, draft-free places, between 75°F to 80°F (24°C to 27°C). The right temperature can greatly affect your calzone’s texture and taste.
To get the best rising, use a proofing box or a warm kitchen spot. But, don’t let the dough get too warm, as it can over-proof.
Testing for Proper Dough Development
Proper dough development is essential for a tasty calzone. There are a few ways to check if your dough is ready, like the window pane test and the poke test.
The Window Pane Test
The window pane test stretches a small dough piece to see if it forms a thin, clear membrane without tearing. If it does, your dough is ready. If not, knead it more.
The Poke Test for Proofing
The poke test checks if your dough has proofed enough. Gently poke the dough with your finger. If the dent slowly springs back, it’s ready. If it springs back fast, it needs more time.
| Dough Hydration Level | Flour Type | Resulting Crust Texture |
|---|---|---|
| 60-65% | All-purpose flour | Soft, slightly chewy |
| 65-70% | Bread flour | Crisp, airy |
| 55-60% | Whole wheat flour | Dense, nutty |
By following these tips, you can improve your easy calzone dough recipe. This will help you make delicious homemade calzones that everyone will love.
Filling and Shaping Your Homemade Calzones

Now that you have your authentic calzone dough ready, it’s time to explore the art of filling and shaping your homemade calzones. The filling and shaping process is where you can get creative and make your calzones truly special.
Classic and Creative Filling Combinations
The filling is the heart of your calzone, and there are countless combinations to try. Classic fillings include ricotta, mozzarella, and parmesan cheese, as suggested by culinary experts. You can also add ingredients like ham, salami, or pepperoni for a meat-lovers version. For a vegetarian option, consider combining roasted vegetables like eggplant, zucchini, and bell peppers with gooey mozzarella.
For those looking to get creative, try using unique ingredients like caramelized onions, artichoke hearts, or sun-dried tomatoes. The key is to balance flavors and textures so that your calzone is neither too dry nor too soggy. As “the art of filling is in the balance”, you should experiment with different combinations to find your perfect match.
Proper Filling Distribution Techniques
Once you’ve chosen your filling, it’s crucial to distribute it evenly within your calzone dough. Start by placing a generous amount of filling on one half of the dough circle, leaving a small border around the edges. Be careful not to overfill, as this can lead to leaks during baking. A good rule of thumb is to use about 1/2 cup of filling for a standard-sized calzone.
Use a spoon to spread the filling evenly, making sure to maintain that border around the edges. This will help you seal the calzone effectively later on. As one expert puts it,
“A well-distributed filling is key to a perfectly cooked calzone.”
Sealing Methods to Prevent Leaks
Sealing your calzone properly is essential to prevent filling leaks during baking. To seal your calzone, start by brushing the edges with a little water or egg wash. Then, fold the dough over the filling and press the edges together firmly. You can use a fork to crimp the edges for a more secure seal.
Make sure to press firmly but gently to avoid tearing the dough. If you’re having trouble getting a good seal, try chilling your filled calzone in the refrigerator for 10-15 minutes before baking. This will help the dough firm up, making it easier to achieve a tight seal.
Baking Perfect Calzones with Your Homemade Dough
Now that you have your homemade calzone dough, it’s time to bake it. Baking is key to a great calzone. We’ll cover the important steps for a perfectly baked calzone.
Oven Temperature and Positioning for Even Cooking
First, preheat your oven to the right temperature. For calzones, aim for 425°F to 450°F. Place your calzone on the middle rack for even cooking. If you have a pizza stone or Baking Steel, preheat it too for a crispy crust.
Tip: Use a convection oven if you have one. It helps cook the calzone evenly.
Baking Times and Visual Cues for Doneness
Baking time depends on your calzone’s size and oven. Usually, it takes 15 to 25 minutes. Watch it closely; a golden-brown crust is a sign of doneness. A crust that’s evenly colored and sounds hollow when tapped is ready.
Using Pizza Stones, Steel, and Baking Sheets
The surface you bake on affects the crust. Pizza stones and Baking Steel make it crispy. If you don’t have these, a preheated baking sheet works too.
| Baking Surface | Crust Crispiness | Even Cooking |
|---|---|---|
| Pizza Stone | High | Excellent |
| Baking Steel | Very High | Excellent |
| Baking Sheet | Medium | Good |
Follow these tips to bake perfect calzones with your homemade dough. Remember, practice makes perfect. Don’t worry about the first tries. Keep adjusting until you get the delicious calzone you want.
Troubleshooting Common Calzone Dough Problems

Homemade calzone dough can be tricky. But knowing common problems helps you get it right. Whether you’re using a quick recipe or making dough from scratch, issues can pop up.
Dealing with Dough That Won’t Rise
If your dough isn’t rising, check the yeast’s expiration date. Also, make sure the water was at the right temperature. “Yeast is a living organism, and its activity is crucial for dough rise,” says an expert baker.
Make sure you’re using the correct type of yeast for your recipe. Also, your environment shouldn’t be too cold.
Fixing Tough or Dense Dough
Tough or dense dough often comes from overworking or too much flour. To fix this, try adding a small amount of water to relax the dough. Gently knead the dough just until it comes together, as overworking can lead to a dense final product.
Preventing and Repairing Tears and Leaks
Tears and leaks can ruin a perfect calzone. To prevent them, ensure your dough is evenly thickened and not overfilled. If you notice a tear, you can repair it by applying a small amount of water and sealing it with a fork.
Pre-Baking Fixes
Before baking, inspect your calzones for any weak spots. Brush the edges with a little water and press them firmly to seal any potential leaks.
During-Baking Solutions
If you notice your calzone starting to leak during baking, rotate it to minimize the damage. Keeping an eye on your calzones while they bake can help you catch and mitigate any issues.
By understanding and addressing these common issues, you can improve your homemade calzone dough and achieve better results. Remember, practice makes perfect, so don’t be discouraged by initial setbacks.
Conclusion
Now you know how to make the perfect calzone dough. With a simple recipe, you can make delicious homemade calzones. They’re sure to impress your family and friends.
This article has taught you about the key ingredients, tools, and techniques for making great calzones. From mixing to baking, each step is important. It helps you get the right texture and taste.
As you try different fillings and toppings, you’ll enjoy making your own unique calzones. Don’t be afraid to be creative. Homemade calzones offer endless possibilities.